
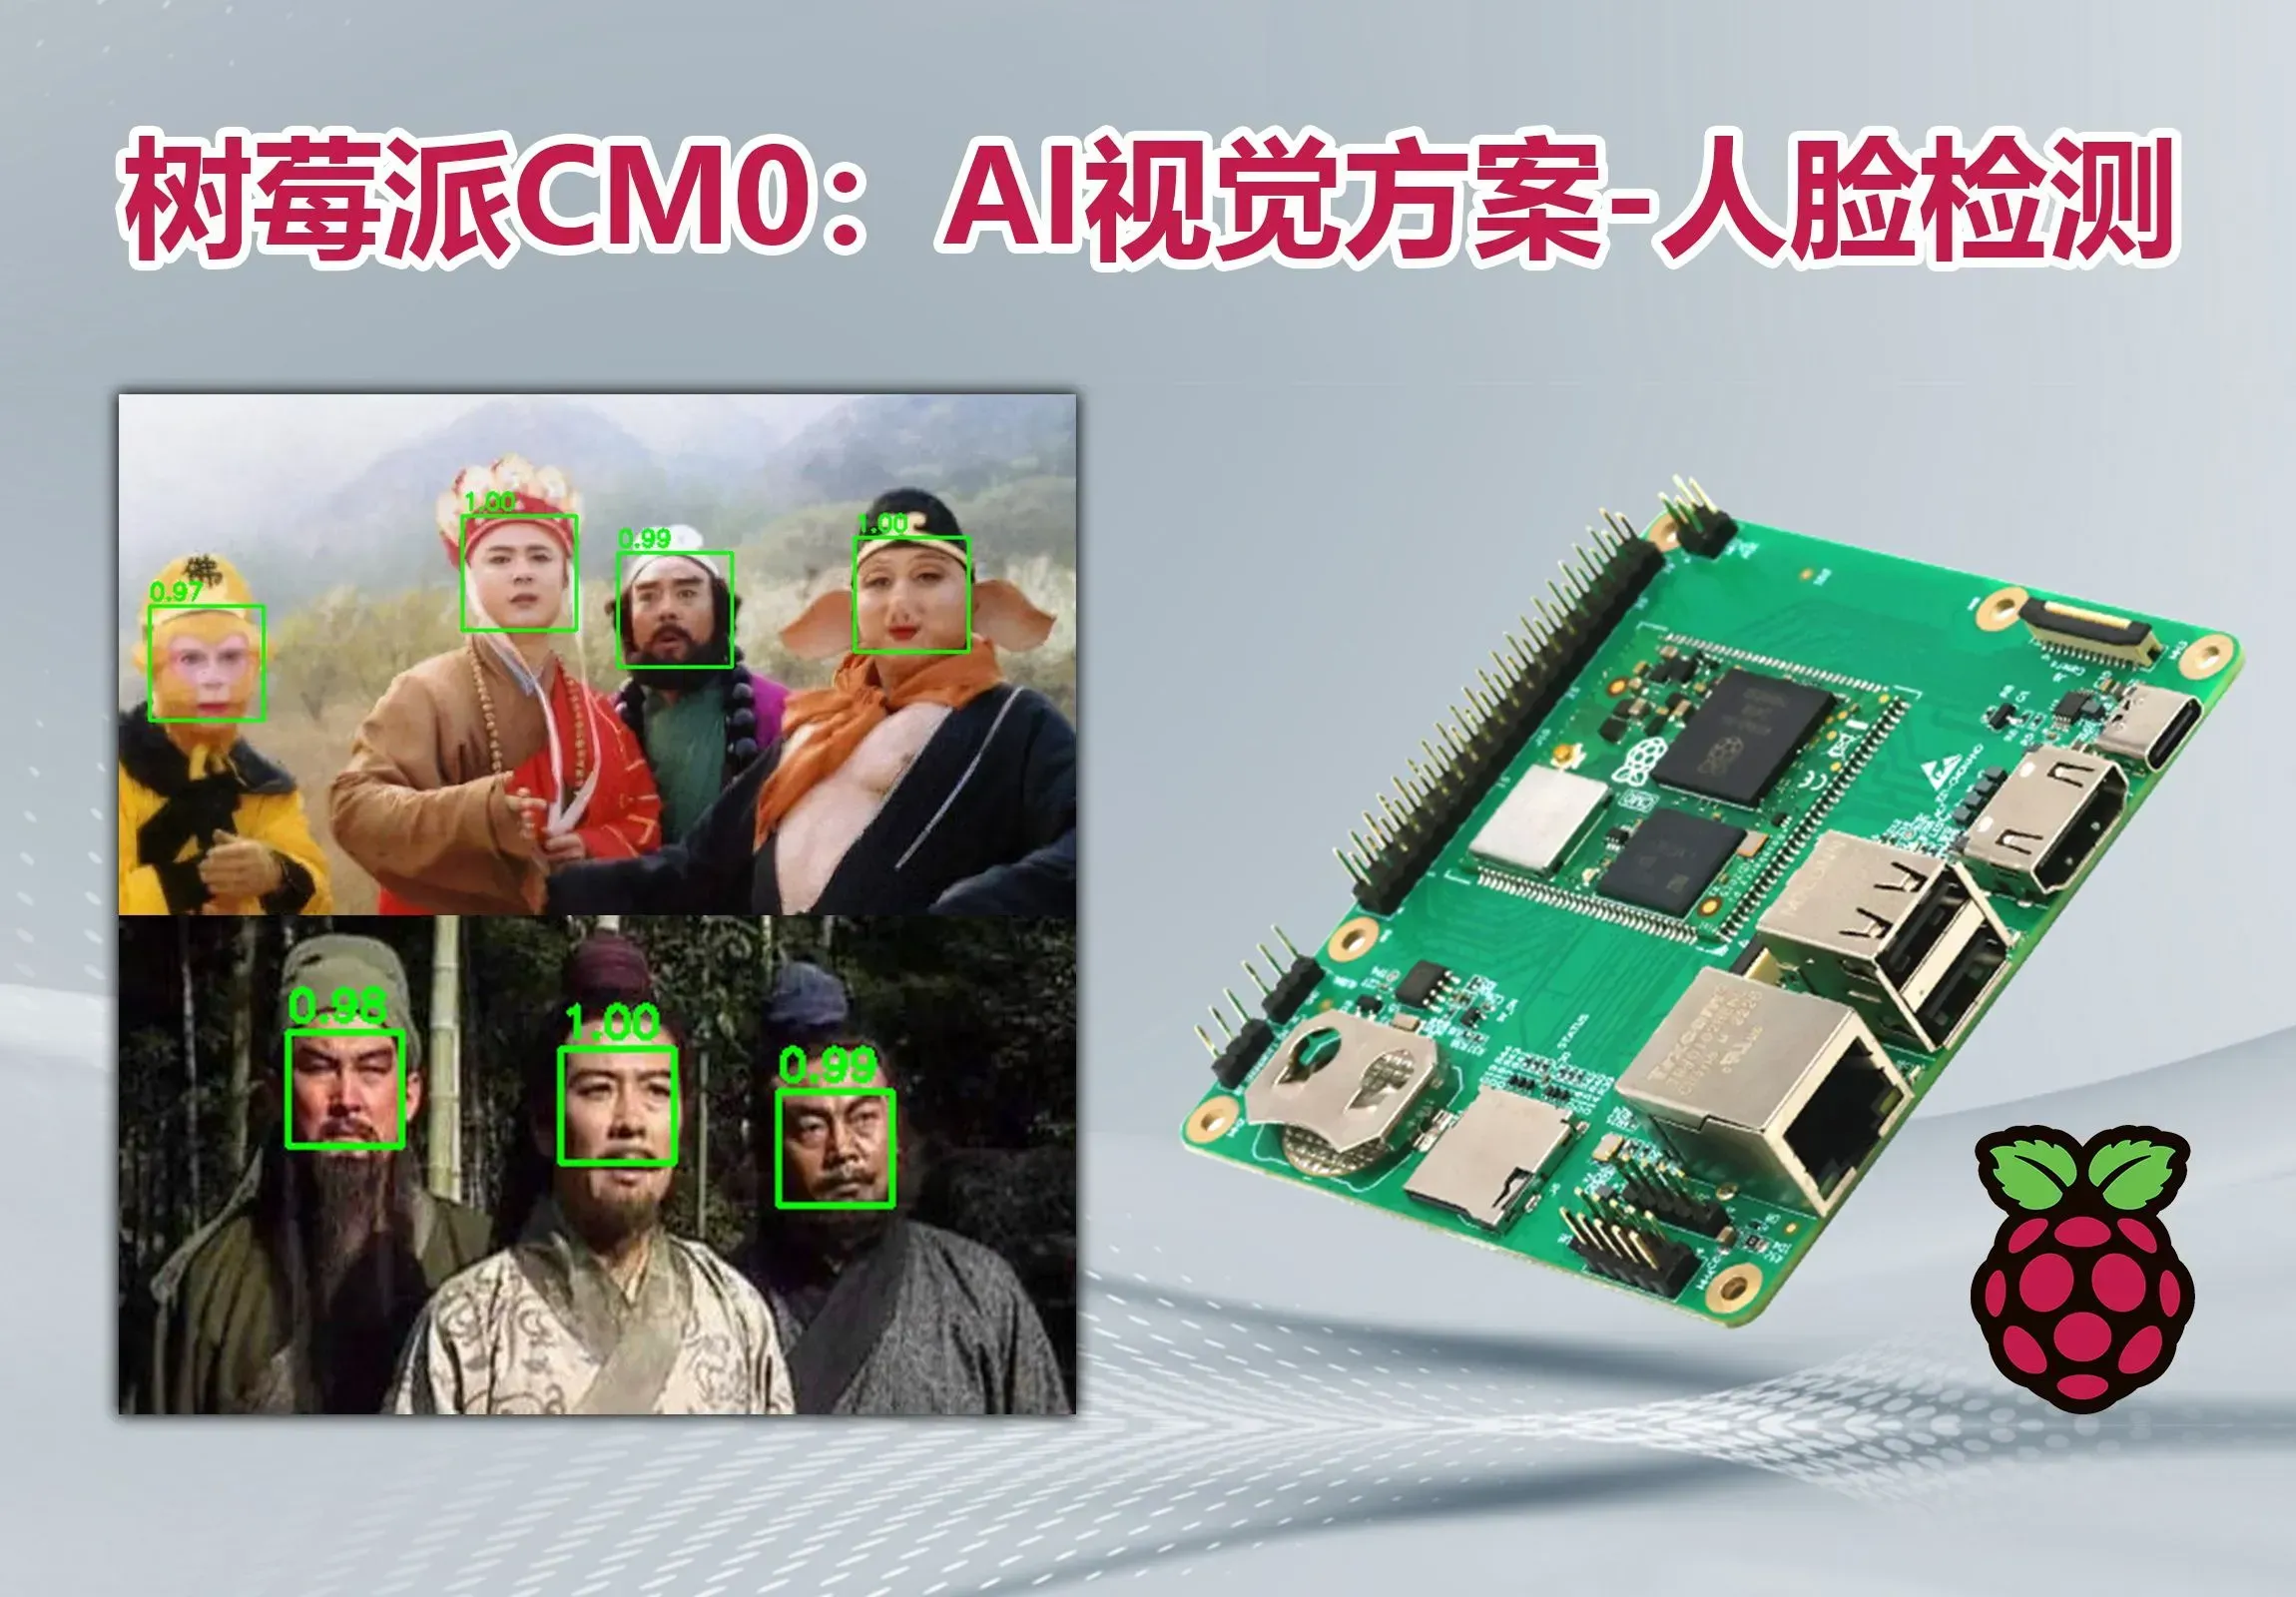
工业树莓派CM0:AI视觉应用部署方案-人脸检测
简介
本文介绍了树莓派 CM0 Dev Board 的实现 AI 视觉应用方案:人脸检测的项目设计,包括准备工作、Harr 级联识别、ONNX 模型识别、流程图、关键代码以及效果演示等。
简介:本文介绍了树莓派 CM0 Dev Board 的实现 AI 视觉应用方案:人脸检测的项目设计,包括准备工作、Harr 级联识别、ONNX 模型识别、流程图、关键代码以及效果演示等。开源协议
:GPL 3.0
(未经作者授权,禁止转载)描述
本文介绍了树莓派 CM0 Dev Board 的实现 AI 视觉应用方案:人脸检测的项目设计,包括准备工作、Harr 级联识别、ONNX模型识别、流程图、关键代码以及效果演示等。
项目介绍
- 准备工作:包括所需 Python 环境以及软件包的安装部署等;
- Haar 级联:使用 OpenCV 自带的数据库实现 Haar 级联检测人脸;
- ONNX 模型:使用 RetinaFace 、YuNet 等轻量化 ONNX模型实现人脸检测的板端推理。
准备工作
系统安装及环境搭建详见:https://edatec.cn/docs/zh/cm0/um/3-booting-the-device/
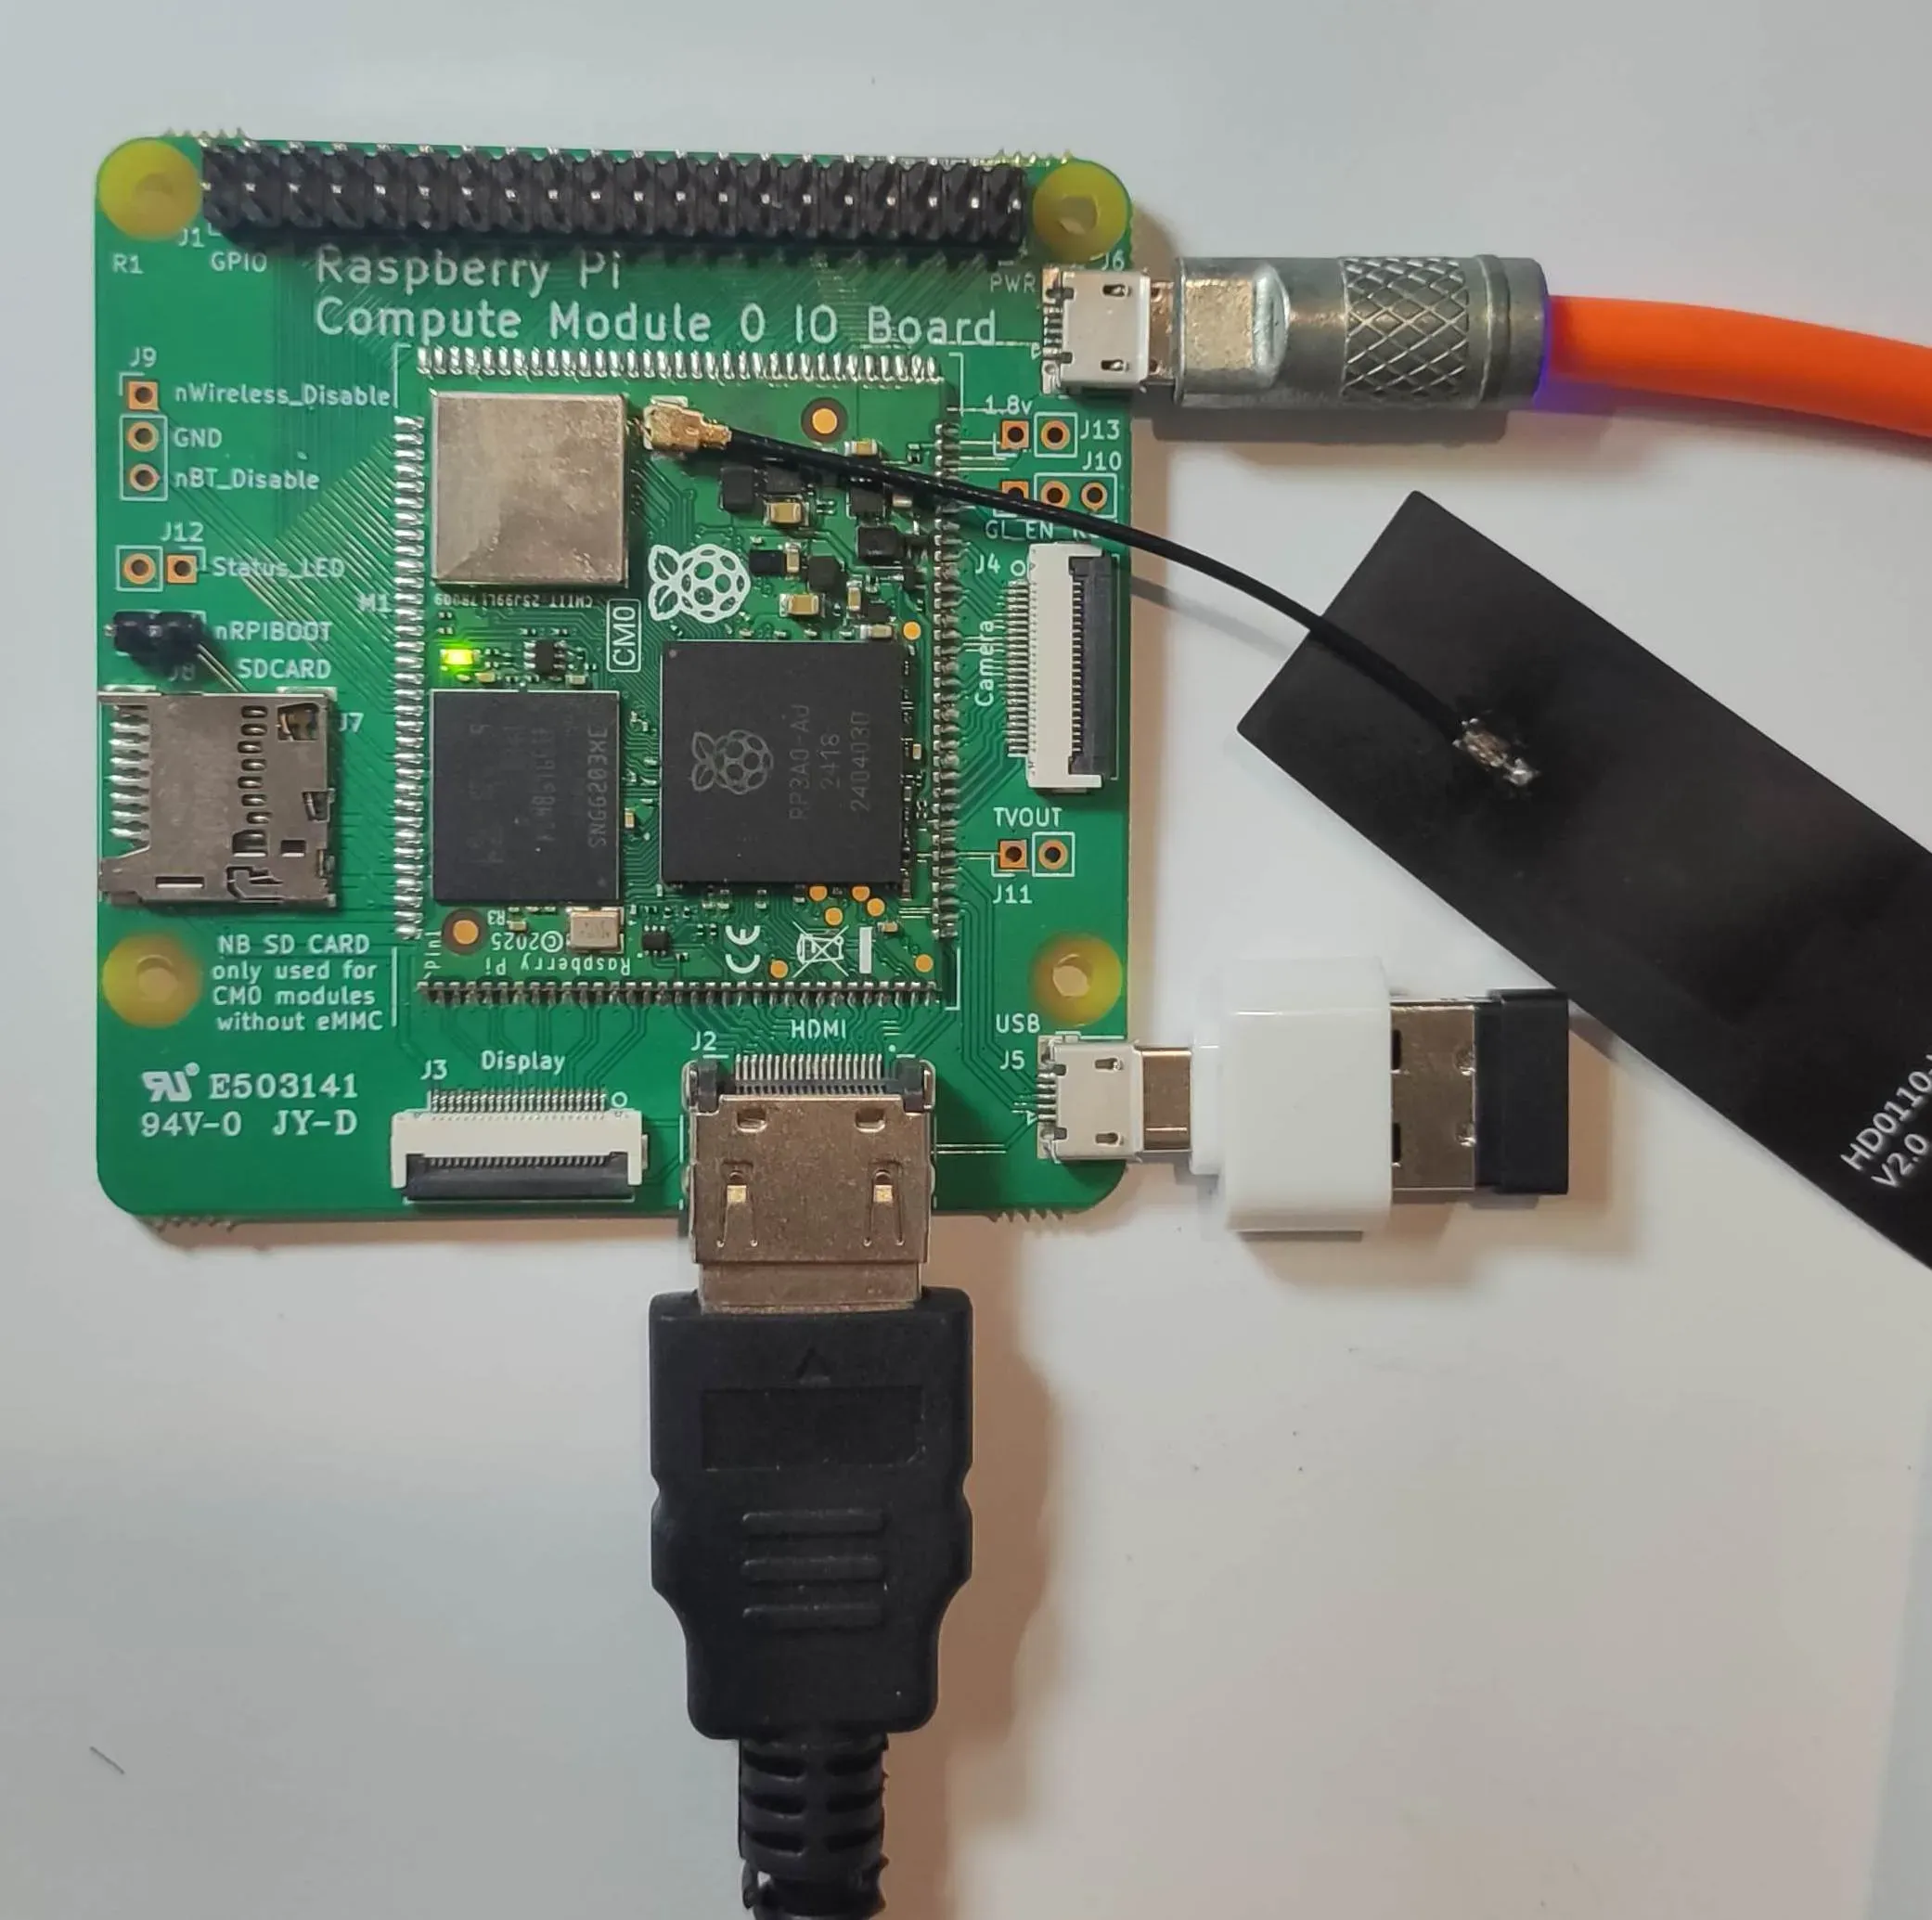
硬件连接
库安装
执行指令 sudo apt install python3-opencv 安装 OpenCV
https://github.com/opencv/opencv

执行指令 sudo apt install opencv-data 补全 OpenCV 库

或 下载 模型文件至本地 ./model 文件;
https://github.com/ultralytics/yolov5/releases/download/v7.0/yolov5n.onnx
mkdir model
cd model
wget https://github.com/opencv/opencv/blob/4.x/data/haarcascades/haarcascade_frontalface_default.xml
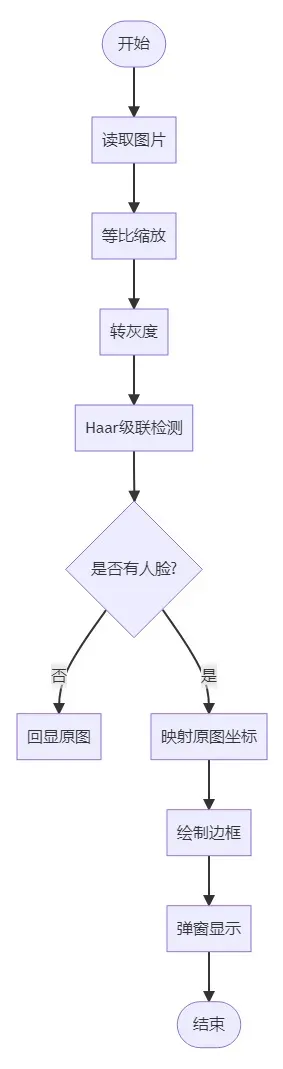
流程图
代码
执行 touch fd_xml.py 指令新建文件,并使用 nano 文本编辑器添加如下代码
import cv2
from pathlib import Path
def detect_faces(image_path: str,
max_side: int = 1280,
padding: float = 0.05) -> None:
"""
零切割人脸检测
:param image_path: 原图路径
:param max_side: 检测前最长边上限(越大越慢,越小越可能漏)
:param padding: 矩形向外扩的边距比例(0.05 = 5 %)
"""
# 1. 读图
img = cv2.imread(image_path)
if img is None:
raise FileNotFoundError(image_path)
h0, w0 = img.shape[:2]
# 2. 等比例缩放
scale = min(1.0, max_side / max(h0, w0))
if scale < 1.0:
img_small = cv2.resize(img, (int(w0 * scale), int(h0 * scale)),
interpolation=cv2.INTER_LINEAR)
else:
img_small = img
h1, w1 = img_small.shape[:2]
# 3. 灰度 + 检测
gray = cv2.cvtColor(img_small, cv2.COLOR_BGR2GRAY)
cascade_path = "/usr/share/opencv4/haarcascades/haarcascade_frontalface_default.xml"
#cascade_path = Path(cv2.__file__).parent / "data" / "haarcascade_frontalface_default.xml"
face_cascade = cv2.CascadeClassifier(cascade_path)
#face_cascade = cv2.CascadeClassifier(str(cascade_path))
faces = face_cascade.detectMultiScale(
gray,
scaleFactor=1.1,
minNeighbors=7,
minSize=(60, 60)
)
# 4. 映射回原图 + 边缘修正
for (x, y, w, h) in faces:
# 映射回原图坐标
x = int(x / scale)
y = int(y / scale)
w = int(w / scale)
h = int(h / scale)
# 外扩边距
dw = int(w * padding)
dh = int(h * padding)
x = max(0, x - dw)
y = max(0, y - dh)
x2 = min(w0, x + w + 2 * dw)
y2 = min(h0, y + h + 2 * dh)
cv2.rectangle(img, (x, y), (x2, y2), (0, 255, 0), 2)
# 5. 显示
max_h = 500 # 高度不超过 500 px
if h0 > max_h:
scale_show = max_h / h0
new_w = int(w0 * scale_show)
show_img = cv2.resize(img, (new_w, max_h))
else:
show_img = img
cv2.namedWindow("Face Detection", cv2.WINDOW_AUTOSIZE)
cv2.imshow("Face Detection", show_img)
cv2.waitKey(0)
cv2.destroyAllWindows()
if __name__ == "__main__":
detect_faces(r"./img/friends.jpg")
保存代码;
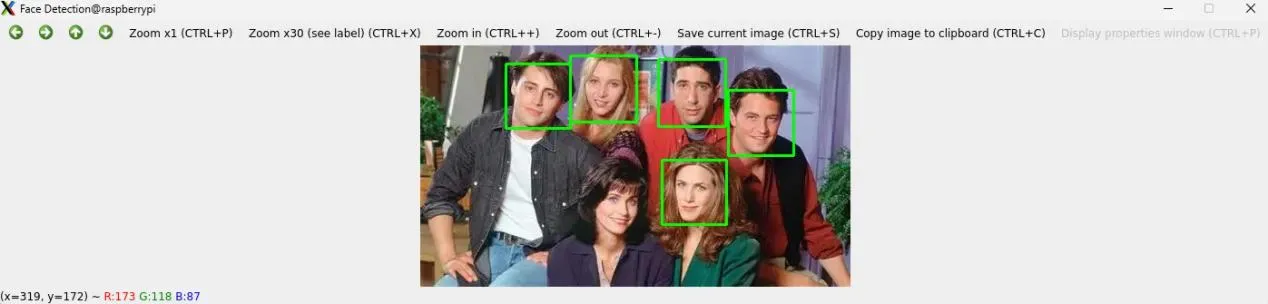
效果
终端执行 python fd_xml.py 弹窗显示人脸检测结果;
ONNX 模型
Open Neural Network Exchange (ONNX) 是一个开放的生态系统,为 AI 开发人员提供支持 随着项目的发展选择正确的工具。

ONNX 为 AI 模型(包括深度学习和传统 ML)提供开源格式。它定义了一个可扩展的计算图模型,以及内置运算符和标准的定义 数据类型。
详见:https://github.com/onnx/onnx
这里使用 ONNX 模型实现人脸检测。
准备工作 - 库安装
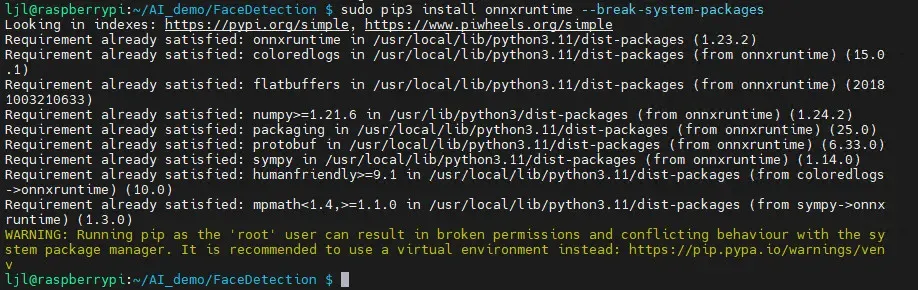
安装解析 ONNX 模型所需的 onnxruntime 库,终端执行
sudo apt install python3-pip
sudo pip3 install onnxruntime --break-system-packages
安装完成
模型下载
可实现人脸检测的模型有许多,这里选择轻量化的 RetinaFace 模型。
新建 model 文件夹,并拉取训练好的 ONNX 模型,终端执行代码
mkdir model
cd model
也可获取更多模型
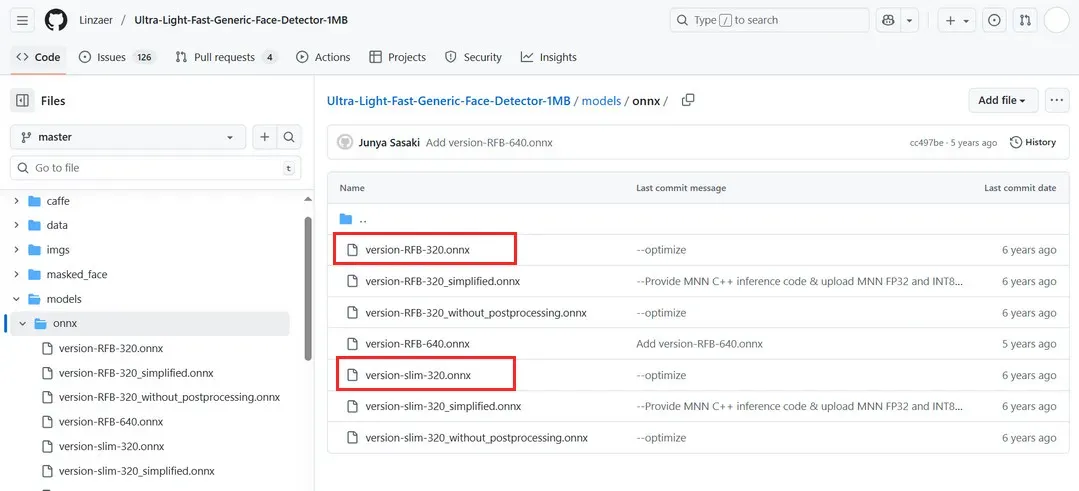
详见:https://github.com/Linzaer/Ultra-Light-Fast-Generic-Face-Detector-1MB
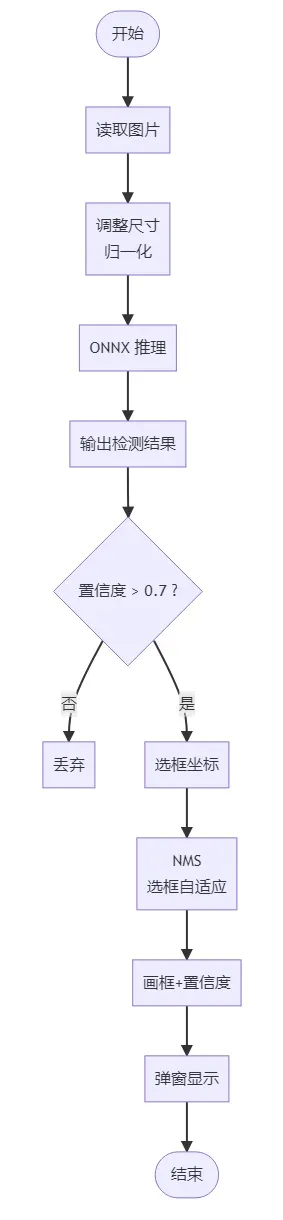
流程图
代码
执行 touch fd_onnx.py 指令新建文件,并使用 nano 文本编辑器添加如下代码
import cv2
import numpy as np
import onnxruntime as ort
import os
def correct_face_detection(model_path, image_path):
"""正确的UltraFace检测实现"""
# 加载模型
session = ort.InferenceSession(model_path, providers=['CPUExecutionProvider'])
input_name = session.get_inputs()[0].name
# 读取图片
image = cv2.imread(image_path)
if image is None:
print(f"无法读取图片: {image_path}")
return []
orig_h, orig_w = image.shape[:2]
print(f"原始图片尺寸: {orig_w}x{orig_h}")
# 预处理
resized = cv2.resize(image, (320, 240))
input_tensor = resized.astype(np.float32) / 255.0
input_tensor = input_tensor.transpose(2, 0, 1)
input_tensor = np.expand_dims(input_tensor, axis=0)
# 推理
outputs = session.run(None, {input_name: input_tensor})
scores, boxes = outputs
print(f"输出形状 - scores: {scores.shape}, boxes: {boxes.shape}")
# 处理检测结果 - 使用更严格的过滤
all_faces = []
for i in range(scores.shape[1]):
face_score = scores[0, i, 1] # 人脸置信度
# 提高置信度阈值,减少误检
if face_score > 0.9: # 从0.7提高到0.9
box = boxes[0, i]
# UltraFace输出是相对坐标 [0,1] 范围
x1 = int(box[0] * orig_w)
y1 = int(box[1] * orig_h)
x2 = int(box[2] * orig_w)
y2 = int(box[3] * orig_h)
width = x2 - x1
height = y2 - y1
# 更严格的尺寸过滤
if width > 40 and height > 40 and width < 300 and height < 300:
all_faces.append([x1, y1, x2, y2, face_score])
print(f"高质量候选框: {len(all_faces)} 个")
# 改进的NMS去重
def nms(boxes, scores, iou_threshold=0.4):
"""非极大值抑制"""
if len(boxes) == 0:
return []
# 按分数排序
order = np.argsort(scores)[::-1]
keep = []
while order.size > 0:
i = order[0]
keep.append(i)
if order.size == 1:
break
# 计算IoU
xx1 = np.maximum(boxes[i, 0], boxes[order[1:], 0])
yy1 = np.maximum(boxes[i, 1], boxes[order[1:], 1])
xx2 = np.minimum(boxes[i, 2], boxes[order[1:], 2])
yy2 = np.minimum(boxes[i, 3], boxes[order[1:], 3])
w = np.maximum(0.0, xx2 - xx1)
h = np.maximum(0.0, yy2 - yy1)
inter = w * h
area_i = (boxes[i, 2] - boxes[i, 0]) * (boxes[i, 3] - boxes[i, 1])
area_other = (boxes[order[1:], 2] - boxes[order[1:], 0]) * (boxes[order[1:], 3] - boxes[order[1:], 1])
iou = inter / (area_i + area_other - inter)
# 保留IoU小于阈值的框
inds = np.where(iou <= iou_threshold)[0]
order = order[inds + 1]
return keep
if all_faces:
# 转换为numpy数组以便NMS计算
boxes_array = np.array([[x1, y1, x2, y2] for x1, y1, x2, y2, score in all_faces])
scores_array = np.array([score for x1, y1, x2, y2, score in all_faces])
# 应用NMS
keep_indices = nms(boxes_array, scores_array, 0.4)
final_faces = []
for idx in keep_indices:
x1, y1, x2, y2, score = all_faces[idx]
final_faces.append([x1, y1, x2, y2, score])
print(f"去重后剩余 {len(final_faces)} 张人脸")
# 显示结果 - 简化显示逻辑
result_image = image.copy()
# 检查图片数据
print(f"结果图片信息: shape={result_image.shape}, dtype={result_image.dtype}")
print(f"像素值范围: {result_image.min()} - {result_image.max()}")
# 如果图片是全黑的,重新创建
if result_image.max() == 0:
print("检测到黑色图片,重新创建...")
result_image = image.copy()
# 绘制人脸框和置信度
for i, (x1, y1, x2, y2, score) in enumerate(final_faces):
color = (0, 255, 0) # 绿色
thickness = 2
# 绘制矩形框
cv2.rectangle(result_image, (x1, y1), (x2, y2), color, thickness)
# 简化标签显示
label = f"{score:.3f}"
cv2.putText(result_image, label, (x1, y1 - 10),
cv2.FONT_HERSHEY_SIMPLEX, 0.5, color, 1)
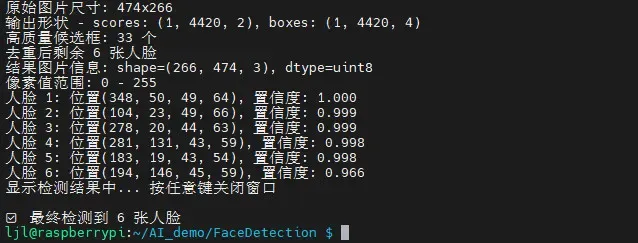
print(f"人脸 {i+1}: 位置({x1}, {y1}, {x2-x1}, {y2-y1}), 置信度: {score:.3f}")
# 显示图片 - 修复显示问题
try:
# 检查图片是否有效
if result_image is not None and result_image.size > 0 and result_image.max() > 0:
# 创建窗口并显示
window_name = f"人脸检测结果 - {len(final_faces)} faces"
cv2.namedWindow(window_name, cv2.WINDOW_NORMAL)
cv2.imshow(window_name, result_image)
print("显示检测结果中... 按任意键关闭窗口")
cv2.waitKey(0)
cv2.destroyAllWindows()
else:
print("错误: 结果图片数据无效或全黑")
# 显示原图作为备用
cv2.imshow("原始图片", image)
cv2.waitKey(0)
cv2.destroyAllWindows()
except Exception as e:
print(f"显示图片时出错: {e}")
# 保存图片到文件作为备用
output_path = "debug_result.jpg"
cv2.imwrite(output_path, result_image)
print(f"结果已保存到: {output_path}")
return final_faces
else:
print("未检测到人脸")
# 显示原图
cv2.imshow("原始图片", image)
cv2.waitKey(0)
cv2.destroyAllWindows()
return []
def main():
model_path = "./model/version-slim-320.onnx"
image_path = "./img/friends.jpg"
if not os.path.exists(model_path):
print(f"模型文件不存在: {model_path}")
return
if not os.path.exists(image_path):
print(f"图片文件不存在: {image_path}")
return
print("开始人脸检测...")
faces = correct_face_detection(model_path, image_path)
if faces:
print(f"\n 最终检测到 {len(faces)} 张人脸")
else:
print(f"\n 未检测到人脸")
if __name__ == "__main__":
main()
保存代码;
效果
终端执行 python fd_onnx.py 弹窗显示人脸检测结果;
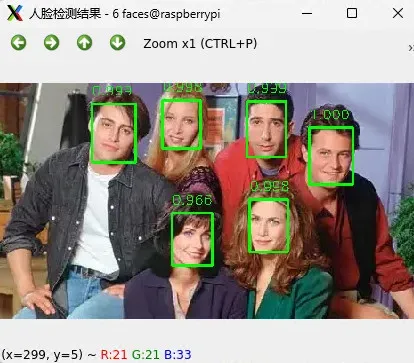
同时终端输出识别信息
简化
为了更加轻量化,简化上述 ONNX 模型处理代码,如下
#!/usr/bin/env python3
import cv2
import numpy as np
import onnxruntime as ort
from pathlib import Path
MODEL_PATH = "model/version-slim-320.onnx" # 240×320 模型
IMG_PATH = "img/friends.jpg"
# ---------- 1. 加载模型 ----------
sess = ort.InferenceSession(MODEL_PATH, providers=['CPUExecutionProvider'])
in_name = sess.get_inputs()[0].name # [1,3,240,320]
out_score = sess.get_outputs()[0].name # [1,N,2]
out_box = sess.get_outputs()[1].name # [1,N,4] x1,y1,x2,y2 归一化
# ---------- 2. 读图 ----------
img0 = cv2.imread(IMG_PATH)
if img0 is None: raise FileNotFoundError(IMG_PATH)
h0, w0 = img0.shape[:2]
# ---------- 3. 预处理(exact 240×320 + FP32) ----------
blob = cv2.resize(img0, (320, 240)) # 宽 320,高 240
blob = blob.astype(np.float32) / 255.0
blob = blob.transpose(2, 0, 1)[None] # NCHW
# ---------- 4. 推理 ----------
scores, boxes = sess.run([out_score, out_box], {in_name: blob})
scores = np.squeeze(scores)[:, 1] # 人脸置信度 [N]
boxes = np.squeeze(boxes) # 归一化框 [N,4]
# ---------- 5. NMS 去重 + 自适应框 ----------
conf_thres = 0.7
nms_iou = 0.3
rel_size = 0.12 # 框边长 = 0.12×图像宽
# 先过滤低置信
keep = scores > conf_thres
boxes, scores = boxes[keep], scores[keep]
# OpenCV NMSBoxes 需要 [x,y,w,h] + 分数
nms_boxes = []
for b in boxes:
x1, y1, x2, y2 = b
w_box = int((x2 - x1) * w0) # 真实像素宽
h_box = int((y2 - y1) * h0) # 真实像素高
nms_boxes.append([int(x1 * w0), int(y1 * h0), w_box, h_box])
if nms_boxes:
indices = cv2.dnn.NMSBoxes(nms_boxes, scores.tolist(), score_threshold=conf_thres, nms_threshold=nms_iou)
for idx in indices.flatten():
x, y, w, h = nms_boxes[idx]
# 自适应框:以检测框为中心,用相对尺寸画框
cx = x + w // 2
cy = y + h // 2
side = int(rel_size * w0) # 统一边长
x1 = max(0, cx - side // 2)
y1 = max(0, cy - side // 2)
x2 = min(w0, cx + side // 2)
y2 = min(h0, cy + side // 2)
cv2.rectangle(img0, (x1, y1), (x2, y2), (0, 255, 0), 2)
cv2.putText(img0, f"{scores[idx]:.2f}", (x1, max(5, y1 - 5)),
cv2.FONT_HERSHEY_SIMPLEX, 0.6, (0, 255, 0), 2)
# ---------- 6. 弹窗 ----------
cv2.imshow("Face-Detection-ONNX", img0)
cv2.waitKey(0)
cv2.destroyAllWindows()
保存代码;
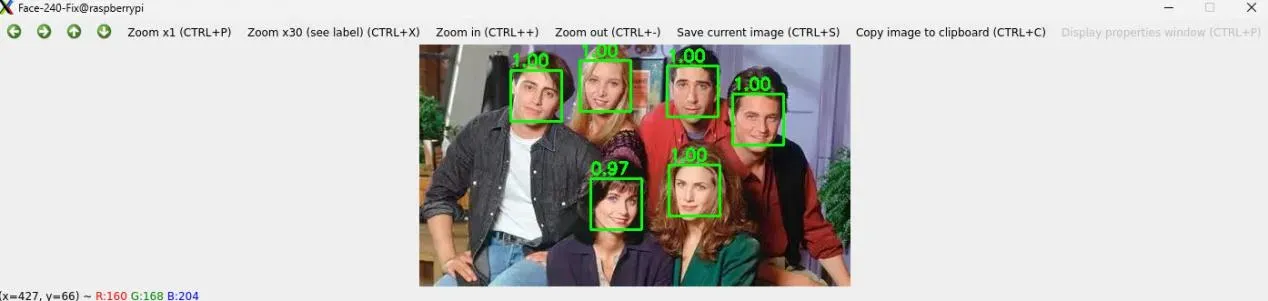
效果
运行代码,可更快速地获得人脸检测效果
更多效果

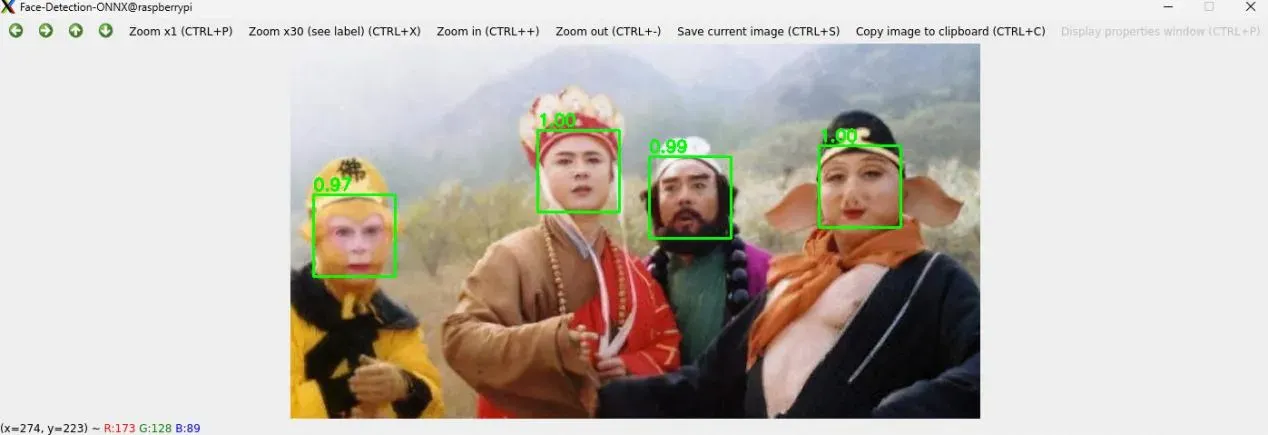
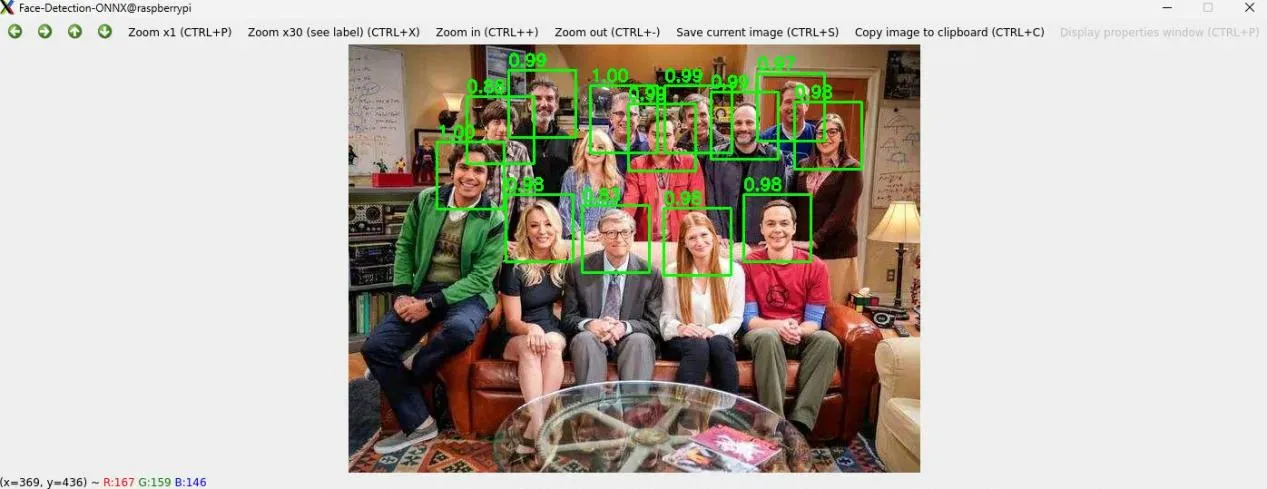
相关模型详见:https://bgithub.xyz/xuguowong/rknn_model_zoo-RKNN/
总结
本文介绍了树莓派 CM0 Dev Board 的实现 AI 视觉应用方案:人脸检测的项目设计,包括准备工作、Harr 级联识别、ONNX 模型识别、流程图、关键代码以及效果演示等,为相关产品的开发设计和快速应用提供了参考。
如需了解Raspberry Pi CM0的详细规格、配置选项、使用文档及技术支持,请咨询上海晶珩。
树莓派CM0及CM0 Dev Board(https://so.szlcsc.com/global.html?k=C51966415)已通过立创商城正式发售!
树莓派CM0 Dev Board 视频介绍:https://www.bilibili.com/video/BV1F3nXzEEcf/
树莓派CM0 Dev Board 优惠券:https://edatec.cn/zh/cm0
设计图
BOM
 克隆工程
克隆工程知识产权声明&复刻说明
本项目为开源硬件项目,其相关的知识产权归创作者所有。创作者在本平台上传该硬件项目仅供平台用户用于学习交流及研究,不包括任何商业性使用,请勿用于商业售卖或其他盈利性的用途;如您认为本项目涉嫌侵犯了您的相关权益,请点击上方“侵权投诉”按钮,我们将按照嘉立创《侵权投诉与申诉规则》进行处理。
请在进行项目复刻时自行验证电路的可行性,并自行辨别该项目是否对您适用。您对复刻项目的任何后果负责,无论何种情况,本平台将不对您在复刻项目时,遇到的任何因开源项目电路设计问题所导致的直接、间接等损害负责。
 暂无相关工程
评论