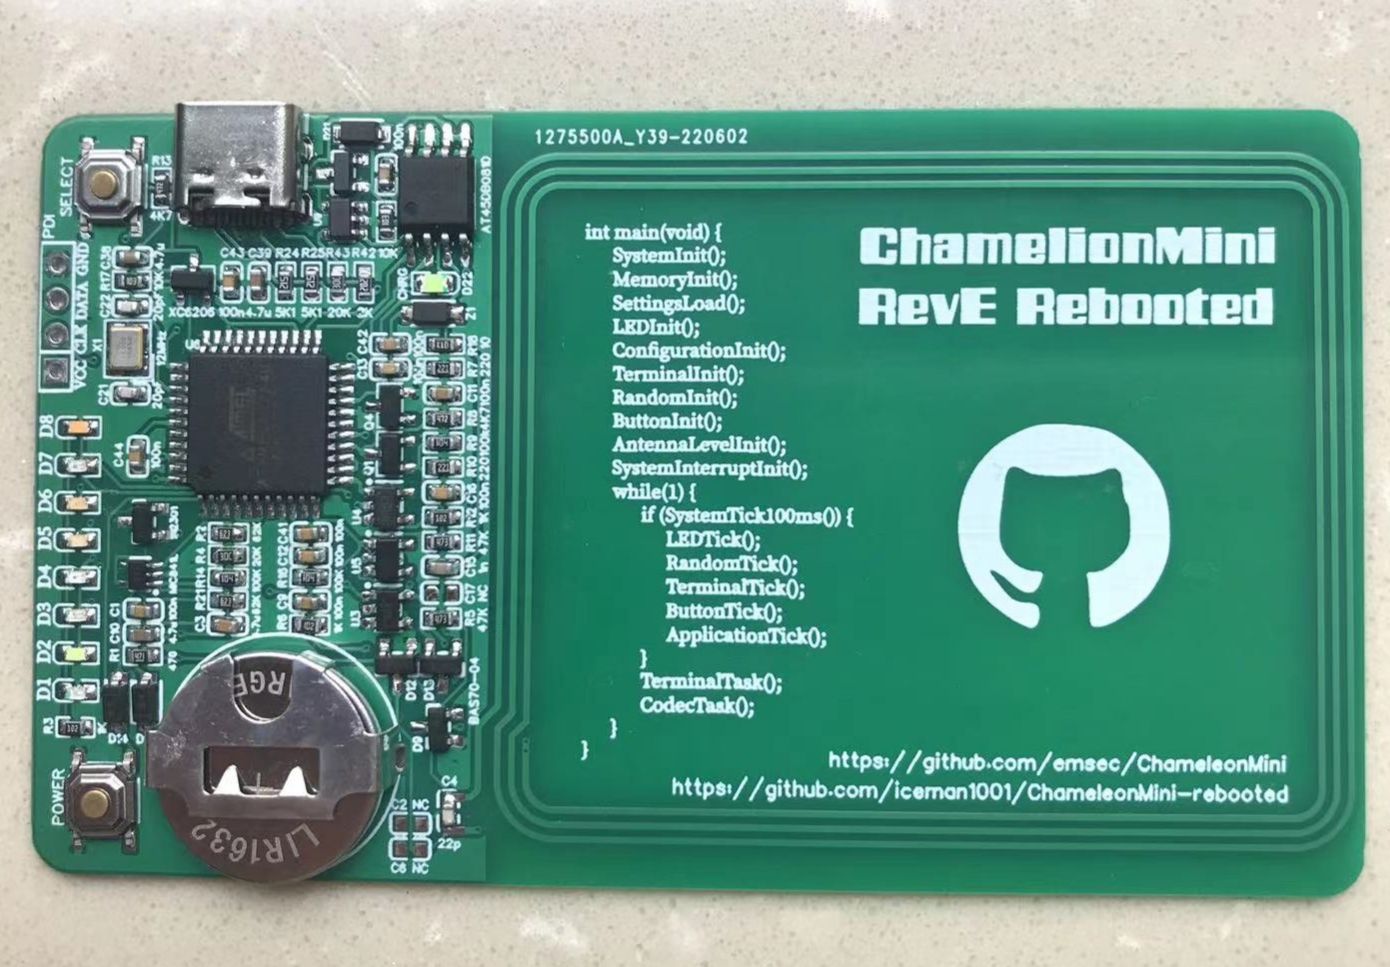
变色龙ChameleonMini
简介
变色龙ChameleonMini基于德国大学在研究RFID安全时所设计的一块针对多频段多类型RFID模拟的硬件。实现M1卡模拟、密钥嗅探等功能。
简介:变色龙ChameleonMini基于德国大学在研究RFID安全时所设计的一块针对多频段多类型RFID模拟的硬件。实现M1卡模拟、密钥嗅探等功能。开源协议
:Public Domain
描述
一、严正声明:
1、本次分享目的单片机应用软硬件的学习交流,不打算用于任何实际应用,各位也不要把这个东西用于任何非法用途;
2、变色龙在某宝上有大量出售,如想使用变色龙的功能可以直接去买,没必要舍近求远自己做,特别是在现在ATXMEGA32A4U价格被炒到量子态的时候;
3、变色龙的使用方法请各位自己去查,不要问我,我也不懂;
我的另一个缩小体积的版本已发布:变色龙ChameleonMiniRevERebooted 2.1,欢迎大家批评指正。

变色龙ChameleonMini基于德国大学在研究RFID安全时所设计的一块针对多频段多类型RFID模拟的硬件。实现M1卡模拟、密钥嗅探等功能。
ChameleonMini经开源后分支出G版和E版,E版又经大佬改造后发展出ChameleonMini RevE Rebooted。本设计主要参照github上iceman1001发布的工程,我根据手上有的元件及调试实际情况进行了少许修改:
1、整板元器件都在一面,总体厚度比较薄(和某宝上的都不一样);
2、改用可充电的扣式锂电池(LIR1632),板载充电电路;
3、使用TYPEC接口(毕竟我买了100个TYPEC母座用不完);
硬件没什么可说的:
之前的一个实验版本,电池采用不可充电的CR1220,结果无法带动这个芯片:

正式发布1.0版本(2022-06-07),使用可充电锂电池LIR1632带充电功能。注意目前发布的两个PCB都是这一版,只是天线部分图案设计不同:
1、因可充电电池基准电压为3.6V(满电时超过4V),超过了ATXMEGA32A4U供电电压范围,不能按官方设计电池直接供电。改为电池与USB供电都过LDO,增加电池与USB供电的切换电路,同时增加了对电池的充电电路,实现可充电功能;
2、根据实际测试,修改了延迟关闭电路电路的中的充电电阻,以延长系统启动后的关闭时间;
3、根据实际测试,修改感应自启动电路,将电压比较器分压电阻阻值进行了调整,确保感应启动功能有效。

二、冰人固件刷入步骤:
1、固件刷写器:
ATXMEGA32A4U使用PDI接口进行bootloader或固件刷入。
PDI接口的官方刷写工具据说比较贵,因此需要将USBASP改造为PDI刷写器,大家可以使用我开源的另一个项目: 带PDI接口的USBASP
注意,对变色龙刷写固件时,USBASP上输出电压选择跳线必须设置为3.3V,PDI开关短接。
2、固件获取地址:
https://github.com/iceman1001/ChameleonMini-rebooted
可下载编译好的固件文件ChameleonMini.eep、ChameleonMini.hex,也可以下载源码自己编译(我试着编译没有成功,有懂这个的请多指教)
已编译固件及刷写程序我打包放在附件里了。
3、刷新命令:
avrdude -c usbasp -p x32a4u -e
avrdude -c usbasp -p x32a4u -U eeprom:w:ChameleonMini.eep
avrdude -c usbasp -p x32a4u -U application:w:ChameleonMini.hex
D:\working\CMFlash>avrdude -c usbasp -p x32a4u -eavrdude: AVR device initialized and ready to accept instructionsReading | ################################################## | 100% 0.02savrdude: Device signature = 0x1e9541 (probably x32a4)avrdude: erasing chipavrdude done. Thank you.D:\working\CMFlash>avrdude -c usbasp -p x32a4u -U eeprom:w:ChameleonMini.eepavrdude: AVR device initialized and ready to accept instructionsReading | ################################################## | 100% 0.03savrdude: Device signature = 0x1e9541 (probably x32a4)avrdude: NOTE: Programmer supports page erase for Xmega devices. Each page will be erased before programming it, but no chip erase is performed. To disable page erases, specify the -D option; for a chip-erase, use the -e option.avrdude: reading input file "ChameleonMini.eep"avrdude: input file ChameleonMini.eep auto detected as Intel Hexavrdude: writing eeprom (44 bytes):Writing | ################################################## | 100% 0.07savrdude: 44 bytes of eeprom writtenavrdude: verifying eeprom memory against ChameleonMini.eep:avrdude: load data eeprom data from input file ChameleonMini.eep:avrdude: input file ChameleonMini.eep auto detected as Intel Hexavrdude: input file ChameleonMini.eep contains 44 bytesavrdude: reading on-chip eeprom data:Reading | ################################################## | 100% 0.04savrdude: verifying ...avrdude: 44 bytes of eeprom verifiedavrdude done. Thank you.D:\working\CMFlash>avrdude -c usbasp -p x32a4u -U application:w:ChameleonMini.hexavrdude: AVR device initialized and ready to accept instructionsReading | ################################################## | 100% 0.03savrdude: Device signature = 0x1e9541 (probably x32a4)avrdude: NOTE: Programmer supports page erase for Xmega devices. Each page will be erased before programming it, but no chip erase is performed. To disable page erases, specify the -D option; for a chip-erase, use the -e option.avrdude: reading input file "ChameleonMini.hex"avrdude: input file ChameleonMini.hex auto detected as Intel Hexavrdude: writing application (26720 bytes):Writing | ################################################## | 100% 10.39savrdude: 26720 bytes of application writtenavrdude: verifying application memory against ChameleonMini.hex:avrdude: load data application data from input file ChameleonMini.hex:avrdude: input file ChameleonMini.hex auto detected as Intel Hexavrdude: input file ChameleonMini.hex contains 26720 bytesavrdude: reading on-chip application data:Reading | ################################################## | 100% 10.95savrdude: verifying ...avrdude: 26720 bytes of application verifiedavrdude done. Thank you. |
4、上位机软件地址:http://www.icesql.se/download/ChameleonMiniGUI/publish.htm
这个上位机与某些UP主在B站上分享得实用方法所用上位机版本不一样,如要使用那个版本的上位机请看下面“官方固件刷新”部分。


三、官方固件刷入步骤(2022-7-3新增): 此方法由同好scetc2008提供,特此感谢!!!
所有用到的软件及包均在附件“官方固件刷入包.zip”里
1、刷入bootloader:
依然使用魔改过的USBASP刷写器,使用PDI接口连接变色龙,刷入atxmega32a4u的bootloader,文件名称:ChameleonMiniRDV2.0_ATxmega32A4U.hex
再次提醒:对变色龙刷写固件时,USBASP上输出电压选择跳线必须设置为3.3V,PDI开关短接。
刷写BOOTLOADER语句:
avrdude -c usbasp -p x32a4u -e
avrdude -c usbasp -p x32a4u -U flash:w:ChameleonMiniRDV2.0_ATxmega32A4U.hex

2、检查bootloader是否刷写成功:
使用USB线连接变色龙和电脑,在设备管理器中查看是否识别到atxmega32a4u。非win10电脑请先安装驱动程:

3、使用USB线刷官方固件:
运行BOOT_LOADER_EXE.exe,确保BOOT_LOADER_EXE.exe同目录下有官方固件文件:myfile.bin、myfilee.bin
刷写过程如下:
D:\working\RevE1.0\2、连电脑线刷固件>BOOT_LOADER_EXE.exe
old_driver_bootloader
Erasing flash... Success
Checking memory from 0x0 to 0x6FFF... Empty.
0% 100% Programming 0x20 bytes...
[>>>>>>>>>>>>>>>>>>>>>>>>>>>>>>>>] Success
0% 100% Reading 0x400 bytes...
0% 100% Programming 0x5800 bytes...
[>>>>>>>>>>>>>>>>>>>>>>>>>>>>>>>>] Success
0% 100% Reading 0x7000 bytes...
load_success!
4、测试连接上位机:
重新插拔连接变色龙的USB线,运行官方上位机程序,看是否连接:

希望大家多多交流,我想向大家学习的有很多很多!
设计图
 未生成预览图,请在编辑器重新保存一次
BOM
 暂无BOM
暂无BOM 克隆工程
克隆工程工程成员
知识产权声明&复刻说明
本项目为开源硬件项目,其相关的知识产权归创作者所有。创作者在本平台上传该硬件项目仅供平台用户用于学习交流及研究,不包括任何商业性使用,请勿用于商业售卖或其他盈利性的用途;如您认为本项目涉嫌侵犯了您的相关权益,请点击上方“侵权投诉”按钮,我们将按照嘉立创《侵权投诉与申诉规则》进行处理。
请在进行项目复刻时自行验证电路的可行性,并自行辨别该项目是否对您适用。您对复刻项目的任何后果负责,无论何种情况,本平台将不对您在复刻项目时,遇到的任何因开源项目电路设计问题所导致的直接、间接等损害负责。


评论